Client: Job Notifications Preferences
To set job notifications preferences for a client, follow the steps below.
- Select My Clients from the main menu at the top of the screen, as shown below.

A list of clients is displayed.
- Click on the target client in Name field, and Edit Client form is displayed. You can see different tabs.
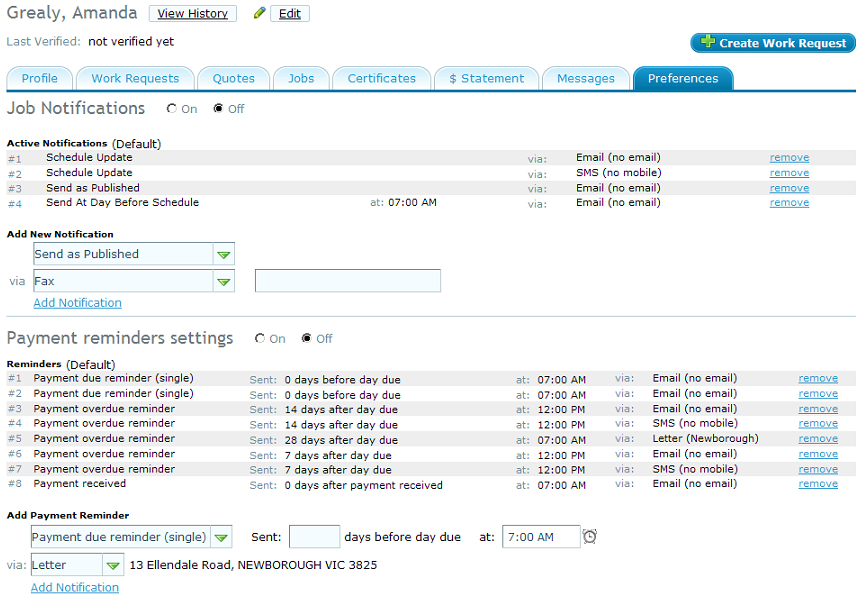
- Click on Preferences tab, and the detailed notifications settings are displayed, as shown below.

- Under Job Notifications section, you can see the details as job schedule name, the time, and mode of how it was scheduled (sms, fax or phone) in Active Notifications. You can also click on remove link to remove the corresponding job notification.
- You can set the Job Notifications to On or Off. Select an appropriate option as required.
- To add a new notification, select an option from Add New Notification list as:
- Send as Published: Select this option to send the notification on users' mobile phone, when the schedule is published.
- Send At Day Before Schedule: Select this option to send the schedule a day before it is published. Click on the time icon to select a time when you want the client to be notified.
- Schedule Update: Select this option to send an updated schedule to the client.
- Manually sent from planner: Select this option if you want the send the notification from planner, manually, that the schedule is published.
- For all the above options, select the mode of communication in via drop-down list. Specify the fax number os sms number in next field.
- Click on Add notification link and you can see the new notification added to the list.
You can click on Reset to default link to restore the default settings of jobs for this specific client. Please see set default notification settings for jobs for all clients, for default settings.
